Monthly Archives: November 2013
SCATTERED SHOES
This is another great project to do with a classroom full of students. Scatter several objects, such as shoes on the floor randomly. If you’re brave, let each student remove one shoe and add it to the mix. Arrange easels around the arrangement so that each student must look down to draw the composition. Each chooses a section about 15′ wide to draw. The student must draw everything that lies within the section. Not only is this good for showing aerial perspective and overlapping, it forces the student to draw from another viewpoint other than eye level. If you want, have students add color to their composition with colored pencils, oil pastels, or pastel.

DRAW-AROUND WITH CONTOUR
This is a good suggestion for a group drawing project. If you have more than eight students, you will want to divide them up into smaller groups to lessen the amount of time needed. Needless to say, I don’t have an example of this, but the project has been very successful when I’ve used it.
Arrange a group of students in a circle around a table. Each is given a small, simple object to be described with contour line. Give them three minutes to do the drawing. At the end of that time, have each student get up, leaving their object and drawing in place, and move clockwise to the next student’s object. They then draw that object on the new student’s paper. Tell them to draw the object larger, smaller, or in another position, and overlap the previous drawing when they can. The drawing can even go off the page if they wish. After three minutes, the students get up again and go to the next position, drawing that student’s object on his/her paper. Keep doing this until all the students have returned back to their original position. Now they can shade in four values to integrate background and foreground, and make the drawings look more 3-dimensional. Display the drawings so that all can see the results.
DO A MANDALA ON BLACK PAPER
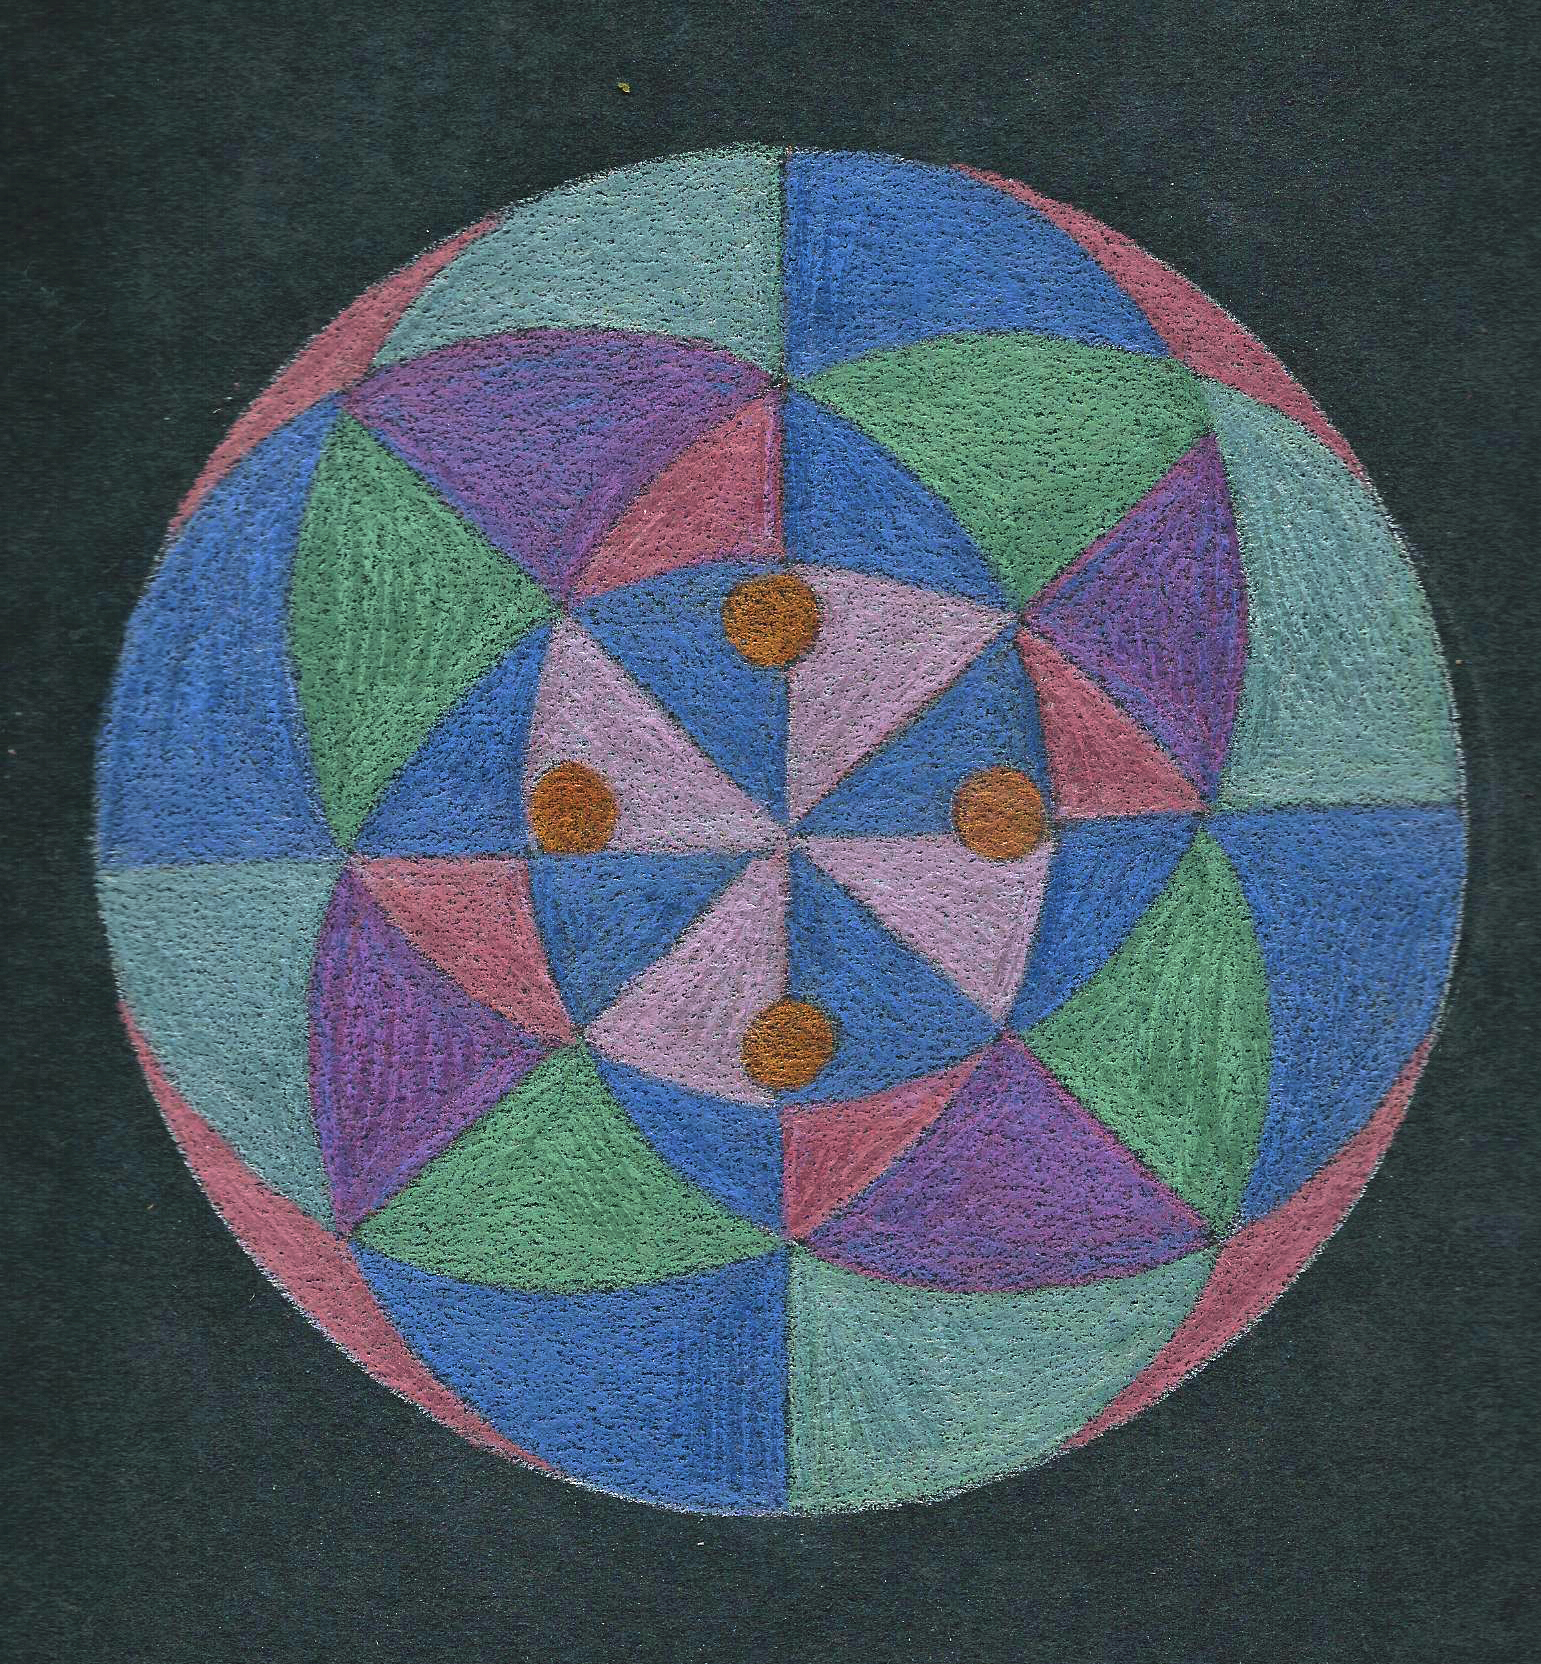
I experimented with a simple mandala on black multi-media artboard just to see what it would look like. I used my metallic Prismacolor pencils that I had never before found a use for! My pattern was made with a small plate, an old CD, and a roll of tape. The black artboard makes it really seem to pop, but brighter pencils would have worked better. I had to layer the pencils several times to cover up the black. Try it for fun, if you wish, and let me know what you think!
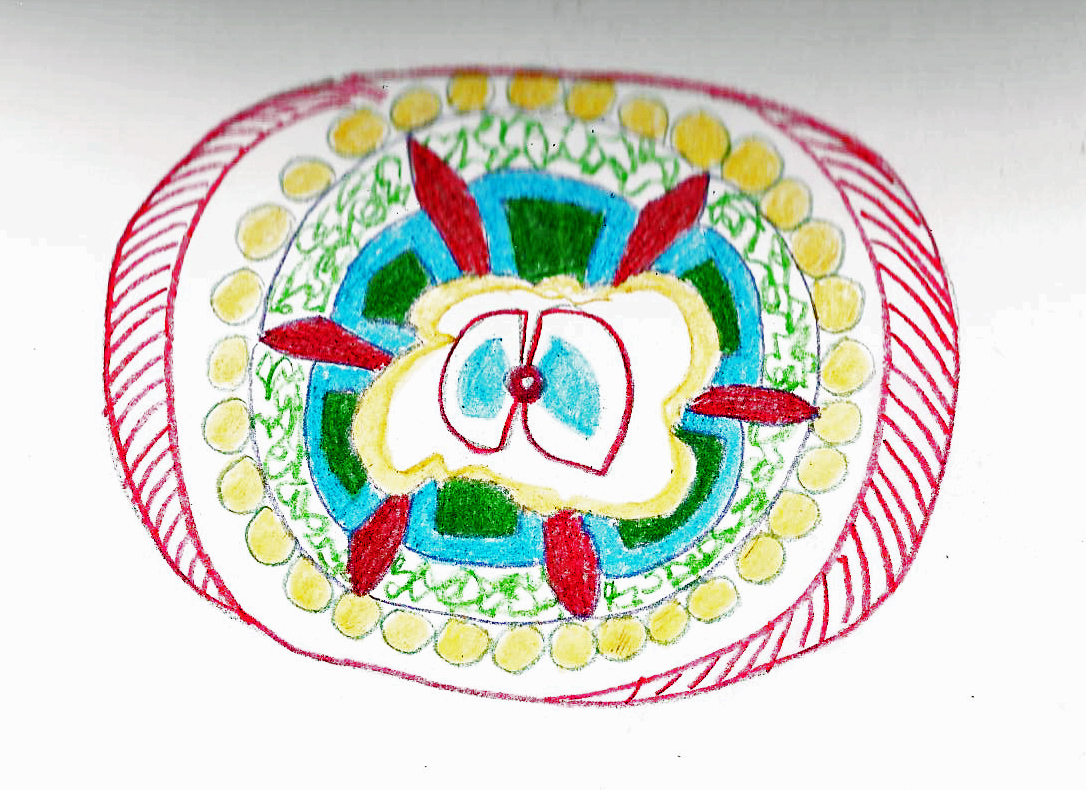
OTHER EXAMPLES OF MANDALAS
HERE ARE SOME OTHER EXAMPLES I’VE DONE FROM TIME TO TIME. I READ THAT CARL JUNG DID A MANDALA A DAY. NOT A BAD IDEA, BECAUSE THEY ARE CREATIVE, SYMBOLIC, MEDITATIVE, AND FUN! MANDALAS DO NOT HAVE TO BE STRUCTURAL, GEOMETRIC, OR EVEN IN A CIRCLE. YOU CAN ALSO TRY DOING ONE IN A SQUARE. YOU DON’T HAVE TO START IN THE MIDDLE, EITHER!
THE FIRST MANDALA I CREATED USING THE 1/4 TEMPLATES (SEE PREVIOUS POST) AND MY INITIALS. CAN YOU FIND THE INTIALS M, A, S?

THE SECOND ONE I DID USING THE NUMERALS 0 – 9. I DID PRETTY MUCH START IN THE MIDDLE. CAN YOU FIND ALL THE NUMERALS?

THE THIRD ONE I DID AFTER A TRIP TO SPAIN AND MOROCCO. IT’S SYMBOLIC OF THE MOORISH INFLUENCE IN THAT AREA. I CAN’T EVEN REMEMBER THE SYMBOLISM I USED EXCEPT FOR THE BUILDING IMAGE. IF YOU NOTICE, I DID NOT START IN THE MIDDLE, AND IT IS NOT GEOMETRIC AT ALL. TRY THIS SOMETIME.

MAKE A MANDALA USING A TEMPLATE
THESE TAKE A LITTLE TIME, BUT ARE MUCH FUN TO DO! MAKE A 9″ CIRCLE ON POSTER BOARD. DIVIDE THE CIRCLE INTO 4 PARTS AND CUT OUT ONE OF THE PARTS TO USE AS YOUR TEMPLATE. (YOU CAN DIVIDE THE CIRCLE INTO 6TH SEGMENTS IF YOU’RE REALLY AMBITIOUS). DRAW AN ABSTRACT DESIGN (DON’T DRAW A SYMBOL OR ANYTHING YOU CAN RECOGNIZE) ON THE TEMPLATE – ONE THAT CAN BE CARRIED OVER INTO OTHER SEGMENTS.
DRAW ANOTHER 9″ CIRCLE ON POSTERBOARD OR OTHER BOARD, AND DIVIDE INTO EQUAL 4ths (OR 6ths). NOW TRACE THE TEMPLATE DESIGN ON ONE OF THE SECTIONS USING GRAPHITE PAPER. THEN REPEAT TRACING THE DESIGN ONTO THE REST OF THE SEGMENTS. WHEN YOU ARE PLEASED WITH YOUR DESIGN, USE MARKERS, COLORED PENCILS, OR CRAYONS TO COLOR THE DESIGN AS YOU WISH.


INTRODUCTION TO THE MANDALA
“REAL ART IS MADE FROM THE INSIDE OUT, NOT THE OUTSIDE IN.”
One of the most meditative and creative ways to draw and paint is to use the mandala form of art. The making of mandalas has been around for a long time – even cavemen drawings depicted spiral forms. Mandalas are usually designed within a circle as a symbol for wholeness, or the circle of life. The word itself is Sanskrit for “healing circle.” Mandalas have been used mainly in Tibetan Buddhism, but also within Native American traditions. Modern Jungian psychology also used the mandala as a way of exploring the hidden recesses of self. Carl Jung said, “The mandala is the Self, the wholeness of the personality which if all goes well, is harmonious.” He believed that all parts of a person: body, mind, and soul must be brought together for healing.
The mandala has been used in Christian symbolism as well. Do you remember Jesus’ answer to the question, “Teacher, which commandment in the law is the greatest?” His reply was: “You shall love the Lord, your God, with all your heart, with all your soul, and with all your mind. This is the greatest and the first commandment.” If you think about it, circles are all around us in life. We are created from an egg and nestled in a circular place, the womb. A bird’s nest is a mandala — a cell is a mandala — the sun– the moon– even the world is in the mandala shape. Can you think of any other circular shapes in nature?
Begin by finding a quiet, comfortable place to draw. Relax and breathe deeply for a few minutes. For this first project, draw a large shape, whether circular, square, or oblong on your paper – whatever feels right for you. Most mandalas are built on a pattern that expands in all directions from the center with no clear top and bottom. Whatever you choose to put within this framework might represent various aspects of your life: past, present and future. It can be as complex or as simple as you like. Use crayons, markers, pastels, or colored pencils to fill in the shape from the center outward using only abstract forms. Be sure not to draw any recognizable forms. Keep working from your subconscious until you feel that the composition is complete.
Now, look at your composition. Is there a focus (center of interest)? What colors did you use? Is there a story here to be told? How do the shapes fit together? Can you analyze your own design? What colors did you use? Send me your attempts and any comments, please. My attempt at a purely abstract mandala can be seen below. That looks like crossed eyes in the middle doesn’t it! I used colored pencils and just let it happen. Remember, there is no right or wrong way to do this!
In future posts, I will explore other ways to design a mandala. There are myriads of resources out there — a lot of mandalas that can just be colored in from Dover Publications for one. I’ll give you some suggestions later on.