Blog Archives
NEW CLASS IN MAUMELLE
 Well, I’m going to teach an art class again — thought I was finished with that, but guess it’s in my “blood.” Beginning September 15 (Thursday) from 1:30 – 3:30, I will be teaching a class on how to compose a work of art at the Maumelle Senior Wellness Center in Maumelle. This is a seven week class, and will include examples, critiques, information, exercises, and perhaps occasional homework. Students will use their own materials, as well as materials provided by the instructor. I’ve had many years of experience teaching this subject, both in high school art classes, children’s classes, and adult classes. A lot of the lessons will be based on the blogs I’ve shared on this site. Cost is $45, and there is a maximum of eight students so call MSWC as soon as possible, if you want to register (501- 851-4344). I’m looking forward to seeing you and sharing my understanding of composition and design principles.
COLOR THEORY: COMPOSITION IN TRIADS

First of all, I’ve had computer problems this week, so I’m late in posting this. I’m back on track however!
If you divide the color wheel equidistantly, you will have a triangle and thusly, a triadic color scheme. This becomes a highly contrasting scheme and could be difficult to pull off! You will need to mix two of the colors together to make semineutrals. Your scheme will be either warm or cool dominant depending on the intense color used. If done well, you will have an exciting color composition.
Use of the three primary colors (red, blue, and yellow) become a triadic color scheme, but some of the other colors are easier to work with. This first example is using Ultramarine Blue, Indian Red, and Hooker’s Green. These correspond to blue-violet, yellow-green, and red-orange on the color wheel. I didn’t use a lot of neutrals in this. so there’s a lot of intensity.

In this next example, I used Manganese Blue, Raw Sienna, and Violet. These relate to blue-green, yellow-orange, and red-violet on the color wheel. I subdued the violet and raw sienna, so that the yellow-orange is dominant. Which one do you like the best? It’s a lot of fun trying out these color exercises, not to mention how much you learn from them. If you’re interested in this, read Stephen Quiller’s book, Color Choices: Making Sense out of Color Theory. That’s where I got my inspiration.

COLOR THEORY: SPLIT-COMPLEMENTARY COLOR SCHEME

The split-complementary color scheme is just what it says: the complement of one color is split on either side so that it is a 3-color scheme. What happens is that one color temperature becomes dominant and the other is subordinate. Another way of looking at is is to select three analogous colors and then look for the complement of the middle color. In this way, a harmonious relationship is provided as well as an accent color that enlivens the composition. This color scheme is found in nature most often with the hues blue, green, and orange.
To choose your colors, ask yourself what mood you want to convey. Cool colors convey a feeling of peace and calm while warm colors could be used to show activity, vibrancy, brightness. One or two colors could be neutralized while the accent color is used in its intensity.
In my first example, I used a split-complementary scheme of yellow, orange-red, and blue violet. The analogous colors where used predominantly, and the blue-violet was subdued and used only sparingly. It’s a hot summer day!

In my second example, I used a split-complementary scheme of red-violet, blue-violet, and yellow. The warms are dominant, and the yellow is partly subdued. A night scene is suggested. This is a good exercise for you to try – let me know how it turns out!

COLOR THEORY: A COMPOSITION IN COMPLEMENTARY COLORS
A good way to plan a composition is to use recognizable color schemes. Each color scheme has its own appeal and mood. As I wrote about previously, complementary colors are those opposite each other on the color wheel. Complementary color schemes can be pretty chaotic unless one color is used as a predominant, and the other is subordinate. I used a simple composition in the following watercolor studies (5 x 7″) to show how value, intensity, dominant and subordinate color affects the mood.
 STUDY I
I used blue as the dominant hue in this first small study in values from light to dark. The complement, orange, was used as an accent. The study seems to suggest evening with some light from the sinking sun.
 STUDY II
I reversed the colors in this second small study, using orange as the dominant and blue as the subordinate colors. The oranges are used in a variety of values from light to dark, and the accent of blue is used both dark and light in the foreground grasses and in the tree trunks. A little blue can also be found in the texture of the barn. Do you see the difference in the mood?
COLOR THEORY – THE COLOR WHEEL
 Here is an example of the well-known color wheel. I painted this in watercolor several years ago, and it still comes in handy in composing works and in teaching students about color. The colors to the right of the wheel are said to be “warm” colors, and the colors to the left are said to be “cool” colors. The outer circle represents the undiluted color, the first inner circle represents what happens when white is added to the major color, and the inner circle represents what happens when colors opposite to each other are mixed. The hues (colors) thus mixed are neutralized.
The hue at the top of the circle is yellow, to its right is yellow-orange, then orange, then red-orange, then red. Continuing around the rest of the circle is red-purple, purple, blue-purple, blue, blue-green, green, and lastly yellow-green. I’m sure most of you already know about this, but I’m starting out with the basics. In the following weeks, I’ll elaborate and show examples of different color schemes that can be produced from the knowledge of the color wheel.
There are other versions of the color wheel and later on, I’ll write about some of those as well. So please follow my blogs for the next month or so to get the “whole picture!”
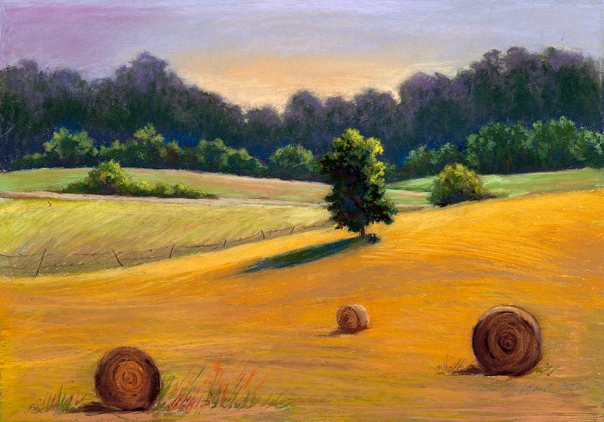
PROGRESSION OF PASTEL PAINTING
 This is how I started that last pastel painting, “Cloudy Sky.” I did an underpainting with grayed-down watercolor trying to keep it simple and only about 4-5 values. When that dried, I began to apply hard pastels over the underpainting.
 At first, I thought about adding a road in the foreground, but soon discarded that idea since my goal was to simplify and soften the landscape. My sky was shaping up fairly well because of the watercolor underpainting. The clouds seemed to have some motion.
 I worked mostly from top to bottom, trying to keep the mountains in the distance by relating their values close to that of the sky. I divided the middle ground into a separate plane and made the foreground a little warmer so that it seemed closer. I wanted especially to get a feeling of distance while still keeping it soft and moody. The tree in the foreground (my center of interest) was completed with little strokes of several greens and purples, with a little yellow ochre.

And this is the final version as shown in my last post. All in all, I had about 5 layers of pastel atop the original underpainting. Purples and greens are muted, but there’s a suggestion of a road with a fence in the farthest plane. Yellow ochre is used as an accent.
Does it help to see how the painting progressed from beginning to end? The biggest problem is knowing when to stop!
COMPOSING WITH FIBONACCI NUMBERS
Now, how can you use the Fibonacci numbers to make a composition that conforms to the Golden Mean or Golden Section? If you use the correct size for the overall composition, it would be about 10 x 16″ – (1-1.618) – a larger format would be 13 x 21″. In order to break this apart, and position your center of interest in the correct spot, you will need to plot the numbers on a sheet of graph paper the correct size. For instance, using a format 13 x 21″, I measured off a 13 x 13″ square on one side, which left a rectangle of 8 x 13″. From this, I formed an 8 x 8″ square leaving a 5 x 8″ rectangle. Then I measured inside this rectangle a square that is 5 x 5″ leaving a rectangle of 3 x 5″. Inside this rectangle, I formed a 3 x 3″ square, leaving a rectangle of 2 x 3″. Inside this rectangle I measured a 2 x 2″ square, leaving a rectangle of 1 x 2″. This rectangle was divided into two squares 1 x 1″ each. So you see, the sequence from inside out is 1,1,2,3,5,8,13,21 — the Fibonacci number sequence. Here’s my result–

If you draw a spiral connecting the corners of each square, it looks like the kind of spirals you see in shells, pine cones, flowers, etc. How about that!

The center of interest should be placed in the smallest squares — the largest section should conform to the principle of using the same value with different hues to keep it integrated. Here is a collage I made using this type of composition. It is a poem collage which reads from the inside out: The earth turns round. Faces the sun; A new day is born. Shall I change another’s life today? Shall I reach a goal or realize my life’s mission? Or shall I still live one day at a time, in the hope that the path I follow is His?

I invite you to try a composition in this format and see how you like it!
THE GOLDEN MEAN – APPLICATIONS
The Golden mean and Fibonacci numbers have been used since the time of Ancient Greece, especially in the design of the Parthenon. This system might have even been used by the Egyptians in building the pyramids. It has been used by artists such as Leonardo da Vinci, Michelangelo, Picasso, Seurat, Signac, Hopper, and Mondrian. Even musicians have used it in their works — Mozart, Beethoven (his 5th Symphony), Bach, Schubert, Bartok, Satie, and DeBussy have all been thought to use the divisions. An article in The American Scientist of March/April 1996 points out that many of Mozart’s sonatas can be divided into two parts exactly at the golden section point in almost all cases. The Mathematics Teaching magazine in 1978 points out that Beethoven used the system. It is even thought that Virgil structured the Aeneid in this way.
In architecture, the Golden Mean is a standard proportion for width in relation to height, in first story to second story buildings, in the sizes of windows. Look at any three-story bank building for instance to see the proportion in use. The College of Engineering at the California Polytechnic State University built the new engineering plaza based on the Fibonacci numbers. Plaza designer Jeffry Gordon Smith said, “As a guiding element, we selected the Fibonacci series spiral, or golden mean as the representation of engineering knowledge. ” The United Nations Building in New York is supposedly built on a golden rectangle.
What is most interesting is the way Leonardo Da Vinci’s The Last Supper was composed. The scene itself is based on two squares, with Christ in the center. All converging lines lead to the vanishing point on the horizon line, his face. The top of the windows lies at a golden section as do the outer edges of the side windows. Christ’s hands are at the golden section of half the height of the composition. The figures are grouped in threes, in a series of four shapes, with Christ forming the fifth. Application of the Fibonacci numbers includes: 1 table, 1 central figure, 2 side walls, 3 windows and figures grouped in 3’s, 5 groups of figures, 8 wall panels and 8 trestle legs, 13 individual figures.
Realizing how often the Golden Mean and Fibonacci numbers have been used in all forms of art, I tried it myself in writing a poem. I admit the structure is a little different, but here’s what I came up with based on the number of syllables in each line:

NOW YOU TRY IT!
THE GOLDEN MEAN: PERFECT PROPORTION
A discussion by Steven Sheehan in the American Artist Magazine, September 2007, included this definition of the Golden Mean or Golden Section: “Also known as the Golden Mean, the Golden Section is a canon of proportion used in painting, sculpture, and architecture thought to have special meaning because of its correspondence to the principles of the universe.” This proportion is thought to be most pleasing to the human eye, and can be used in designing visual art compositions.
In the 1930’s, Pratt Institute in New York interviewed several hundred of its art students as to which vertical frame they liked the best and the least. The ratio of 1:2 was the least liked, while the 1:618 ratio was the preferred frame. If this ratio was to be used in a compositional format, the shape of your paper or canvas should be 10 x 16″ rather than 11 x 14″ or 12 x 16″ (standard sizes). To figure out a larger format using the golden mean start with a square. Using a compass, place the center pin at the midpoint of the bottom edge (B). Swing an arc out from an upper corner and extend the bottom edge of the square out to meet the arc (segment C). Complete the rectangle with B=C as the base. Now A (height) is in the same proportion of B+C as B+C is of A+B+C (the Golden Mean).
We all know how to find the “sweet spot” in a composition for the center of interest: divide the format into thirds both horizontally and vertically, and where any of the sections cross is a good place to put your center of interest. This is the easy way, but not quite in the same proportions as the Golden Mean. The Pastel Journal of December 2005 features an artist who uses the Golden Section for her compositions: Sydney McGinley. Not only does she use the ratio as her format and for placing shapes within the composition, but to choose the right proportion of hues.
Here is an illustration of how to devise your own format in the Golden Section using the method outlined above:

PAINTING LANDSCAPES – THE THUMBNAIL SKETCH
Whether painting in plein air (outside in nature) or painting from a photograph, it is always best to make thumbnail sketches in your sketchbook. Planning ahead reduces the number of mistakes you can make! Plan out several compositions so that you may choose the best one (think of movement, balance, center of interest, focal points, contrast, etc.) Try different formats: vertical, high horizon, low horizon, square, oblong, panoramic. Paintings with high horizons are more grounded and introspective, but you’ve got a lot of foreground to contend with. Low horizons are more spiritual, because the sky can give you mood and movement. You will need clouds, probably. Rectangular compositions are calming.
Try to limit your shapes to only a basic 4-6 by pulling together areas that are close in value. Basic shapes are the most important at this stage. When you think you have a good composition, begin a value sketch. Keep your values to only 4-5: usually the sky is the lightest (value 1) because it’s lit by the sun; the ground plane is the next value (value 2), since it gets reflections from the sky; any slanted shapes are the next lowest value (value 3) because they get partial sunlight, and the upright planes are the darkest value (value 4) because they get little light from the sun.
If you’re working from a photograph, remember that, in a photo all the shadows look black, and sometimes the sky is bleached out. You must lighten up the shadows to be more natural. Try putting together two or more photos to make a good composition. Keep to more medium values and don’t put a lot of dark darks. Refer back to the post of December 28 for information on different value schemes. Also, refer to the post of December 18 for a review.
Here is an example of some of my thumbnail sketches. These were all from the same photo.

